Unfortunately, data for the 11x42mmR Comblain is very hard to come by outside of cartridge collectors. It’s not even in the Handloader’s Manual of Cartridge Conversions by John J Donnelly and Judy Donnelly. Luckily though, the ever-helpful DrakeGmbH has data for the cartridge and even an example of one of the rolled-foil 1871 cartridges made early on which can be seen below in Figure 1. According to DrakeGmbH, the original 1867 11x42mmR cartridge used the same bullet as the Chassepot Rifle over a powder charge of 46.3 gr. Then in 1871, they switched to the similar weighing 386 gr. Engelbert bullet. Then, in 1876, with the introduction of a drawn case, a new powder charge of 58.6 gr. of black powder, sent the 386 gr., 0.443” paper-patched bullet out of the muzzle at about 1100 fps. The projectile design was changed a final time in 1881 to a longer and more streamlined design. Information is very light and if someone has documentation of the various revisions of the cartridge, please comment below.

Figure 1. Examples of various cartridges of the same era. Photo courtesy of DrakeGmbH.
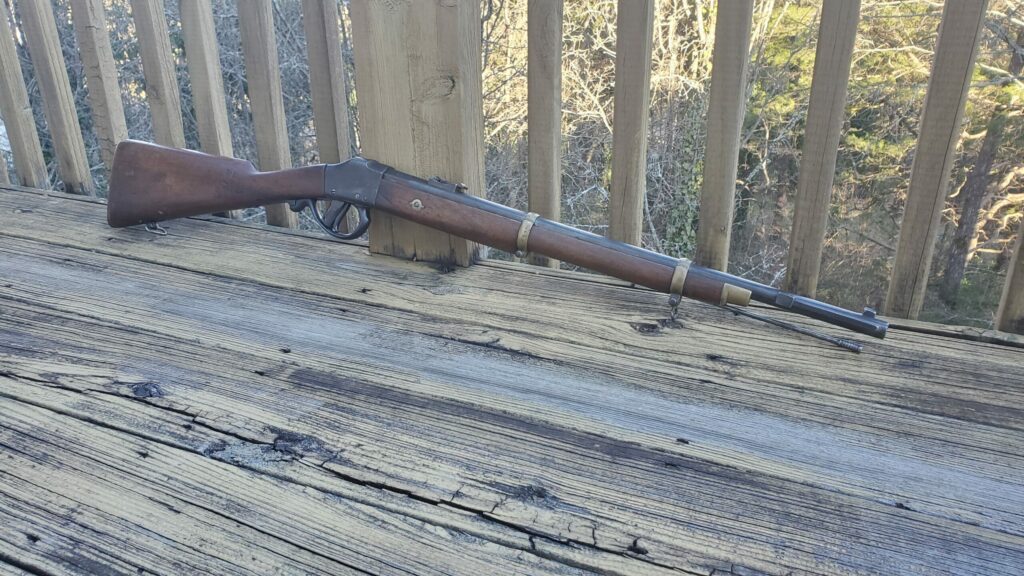
Since there are no reliable sources of cartridge dimensions, we must back out our own. From a chamber casting of my rifle, I was able to create a model of the chamber. With the original rolled-foil 1871 case, I was able to extrapolate dimensions of that case and ensure a fit in the chamber of my rifle. It is important to note here that in antique black powder rifles, the potential reloader should always slug their bore. In my rifle’s case, the bore measures 0.436”/0.456” across the lands/grooves. Because the Comblain chamber doesn’t really have a proper shoulder, the case will blow out quite a lot. Due to this, and keeping in mind the durability of fired cases, I decided to make the cartridge fit a little more tightly than would be normally seen in a rifle of this vintage. The results of the fit between the chamber and designed case can be seen in Figure 2.
Figure 2. Section of the extrapolated cartridge dimensions shown in the chamber.
A similar cartridge doesn’t really exist, but luckily, the body and shoulder of a 10.4x38mmR Swiss cartridge is fairly similar, even if the case and mouth are incorrect. We can take advantage of this similarity, though, in forming the case. First we start with the .50-110 WCF case and chop it down to 1.80”. I have used a Dremel tool to do this before, but it takes a long time to do 50 cases this way. This is the first time I’ve used a mini miter saw to cut cases before, and I will never go back. A view of the setup I used can be seen in Figure 3. I then used a chamfer/deburr tool for its intended purpose.

Figure 3. Setup for quickly chopping brass to size.
Next, I formed the shoulder and neck. Like I mentioned before, the case length of the 10.4x38mmR Swiss cartridge is incorrect, but we can easily adjust for this by threading a 10.4x38mmR Swiss sizing die without the expander 0.250” up from its normal position. I accomplished this by threading the die all the way in until it hit the shellholder on a raised press ram, snugged up the lockring, and using the top of the lockring as a datum, measured to the top of the die. I then threaded out the die incrementally while ensuring the lockring stayed in place while using a pair of calipers to make sure the die was threaded 0.250” out from its original position. Part of this process can be seen in Figure 4.

Figure 4. Measuring the position of the sizing die.
Now we have a case with a proper shoulder, but the case mouth needs to be expanded from 10.4 mm to 11 mm. To accomplish this, I put the expander ball from a Lee .43 Mauser sizing die and fixed it into a Lee universal decapper. This allow me to expand the neck without touching the shoulder or body of the case. After, sizing, we have a case that is sized correctly, but needs to be trimmed to length. Trimming is like any other case. These were trimmed to 1.750” and then chamfered and deburred again. The cases were then expanded (belled). The only die I could find to do this was the expander die for .577-.450 Martini-Henry. The cases were then annealed down past the shoulder. The annealing step is important because the cases will fireform significantly every time they are fired due to the design of the chamber. Bullets were seated with a 10.4x38mmR seating die. An overview of the whole process can be seen in Figure 5.

Figure 5. From L-R: a .50-110 WCF case, .50-110 cut to 1.80″, sized with 10.4x38mmR die, expanded with a .43 Mauser expander, trimmed to 1.750″, case mouth expanded with .577-.450 dies, shoulder and neck annealed, cartridge loaded.
Unfortunately, the rim of .50-110 is just slightly too thin to reliably have the primer ignited by the firing pin and slightly too small in diameter to not jump over the rifle’s extractor. Luckily, both problems can be solved by putting a Size-014 Viton 75 o-ring on the base of the cartridge which solves both problems without sacrificing safety. These can be purchased cheaply on McMaster-Carr. The installed o-ring can be seen in Figure 6. Just remove the o-ring before tumbling and re-use it next firing.

Figure 6. O-Rings installed for better extraction and ignition.
Like I mentioned above, the original cartridge shot a 386 gr., 0.443” paper-patched bullet at 1100 fps with 59 gr. of black powder. I used the same bullet I use for my Chassepot: a 355 gr. bullet cast from a 43-455P mold made by Accurate Molds then paper-patched to 0.442”. For a charge, I used 45.0 gr. Swiss FFg measured by mass. Black powder cartridges should never have an air gap, the charge should always be slightly compressed. Wadding or cornmeal makes this easy when powder charges take up less volume that the case capacity. Remember that any antique firearm should be checked by a competent authority to assess its suitability for firing and my charges are not to be taken as an endorsement, only an accurate report of what I used. The powder charge I used yielded an average muzzle velocity of 1063 fps with a standard deviation of 15.2 fps. The rifle made a 3 MOA group and was right on point of aim at 50 yards. The drastic fire-forming of the case can be seen in Figure 7.

Figure 7. A loaded case next to a fire-formed case. Note that only a slight taper remains where the shoulder and neck once were.
Enjoy shooting your piece of history!
